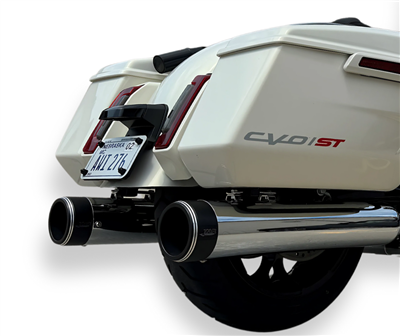
A Redline 2-into-1 swap is one of the more involved installs we sell, mostly because you’re routing a single header off both cylinders instead of just swapping mufflers. It’s still a driveway job with basic hand tools and a couple of hours, but it goes a lot smoother if you watch the full install once before you start pulling bolts. Here’s the walkthrough, plus the order of operations we’d follow.
Tools and Supplies Worth Staging First
Nothing about this job needs specialty equipment, but having everything staged saves the annoying mid-job runs to the parts store. You will want a socket set with extensions, combination wrenches, a torque wrench that covers small fastener specs, penetrating oil, and new exhaust port gaskets, which ship with the system. A lift makes everything easier, but a stable jack with the rear wheel supported works. Gloves matter more than people think: exhaust edges and frame corners find knuckles.
Before You Start
- Let the bike cool completely. A full system holds heat longer than a slip-on, and you’ll be working close to the headers.
- Get the bike stable and level, on a lift if you have one, or securely on a jack with the rear wheel supported if you don’t.
- Have penetrating oil ready for the header bolts and exhaust flange nuts if the bike has any miles on it. These are the fasteners most likely to fight you. Spraying them fifteen minutes before you start is cheap insurance against a rounded fastener.
The Order We’d Do It In
- Remove the stock system as a unit where possible, starting with the muffler mounts, then the header-to-cylinder bolts.
- Dry-fit the new headers before tightening anything down, checking clearance around the frame, floorboards, and any lowers you’re running.
- Install new gaskets at every exhaust port. Reusing old gaskets is the single most common cause of a tick or leak after a system swap.
- Hand-tighten every fastener first, get the whole system aligned and sitting the way you want it, then go back and torque everything to spec in the sequence in your install guide.
- Start the bike and check every joint for leaks before you take it anywhere.
The Mistakes That Cause Comebacks
Almost every problem install we hear about traces back to one of three shortcuts. First, torquing fasteners fully as you go instead of hand-tight first: the system ends up fighting itself, and something is always misaligned by the last bolt. Second, old gaskets: a faint exhaust tick at the head that shows up a week later is almost always this. Third, skipping the leak check: a small leak upstream of the O2 sensor skews the readings your tune depends on, so you end up chasing a fueling ghost that is really a gasket. Ten patient minutes at the end of the job prevents all three.
While everything is apart, it is also the cheapest moment you will ever have to inspect what the exhaust normally hides. Give the header studs, mounts, and nearby wiring a look before the new system goes on, and if the bike is due for basic service, our maintenance checklist pairs well with a day the bike is already on the lift.
After the Install
Plan for a tune. A full system changes the engine’s breathing enough that the stock fuel map is no longer the right map, and the difference between a tuned and untuned full system is the difference between the dyno chart and a flat spot. Heat cycles also settle a new system, so re-check fastener torque after your first real ride. From there, the only maintenance the system asks for is the same washing and care as the rest of the bike; the finish guide covers keeping either finish looking right.
Exact torque specs and bolt patterns vary by model year, so treat this as the general shape of the job, not a replacement for the printed instructions that ship with your system. If something doesn’t match what you see in the video, our part-specific instructions win. And if you want to know what is in the system before you commit, the full spec breakdown covers construction, fitment, and the fine print.